

Password
Learn how to set up authentication using a password.
Overview
One of the most common authentication methods used today is the humble email and password. With this setup, users that come to your website will need to supply these credentials in order to gain access to their account.
Clerk enforces every user to have a verified email address. This is done during sign up, by sending a one-time code to the supplied email address.
There are a few different ways to set up an email/password user management system in Clerk. You can use Clerk Components or build a completely custom flow with ClerkJS or Clerk React. The rest of this guide will explain how to set up an email/password user management system using any of the above methods.
To keep your users safe, Clerk follows a "secure-by-default" policy, and we follow all NIST best practices. This includes password validations out of the box.
Before you start
- You need to create a Clerk Application in your Clerk Dashboard. For more information, check out our Set up your application guide.
- You need to install Clerk React or ClerkJS to your application.
Configuration
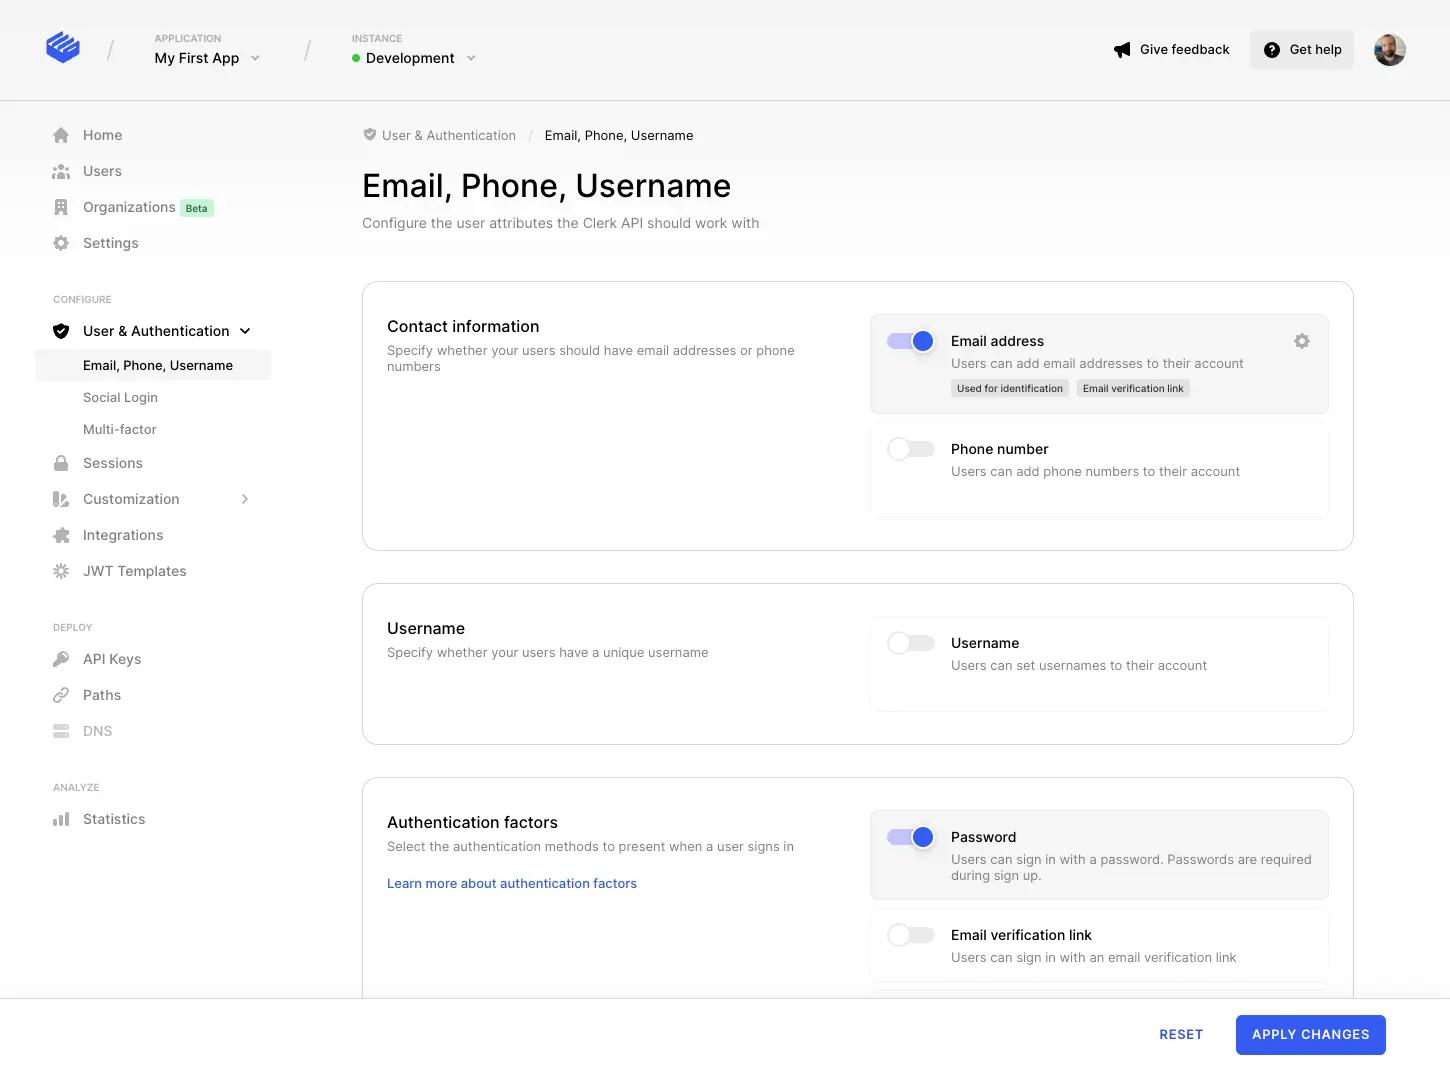
The first thing you need to do is enable email address and password-based authentication on the Email, Phone, Username page.
Select Email address for your contact information and Password as your authentication factor.
Don't forget to click on Apply changes at the bottom of the page!
Instead of email addresses, you could also use phone numbers. All you need to do is choose Phone number in the Contact information section.
Custom flow
In case one of the above integration methods doesn't cover your needs, you can leverage Clerk's APIs to create a completely custom email/password sign-in and sign-up flow.
You will still need to configure your instance for email/password authentication as described at the top of this guide.
Sign up using a custom flow
The email/password sign-up flow requires users to provide their email address and their password and returns a newly-created user with an active session. The important thing to note here is that a user's email address needs to be verified before the registration is completed.
A successful sign-up consists of the following steps:
- Initiate the sign-up process, by collecting the user's email address and password.
- Prepare the email address verification, which basically sends a one-time code to the given address.
- Attempt to complete the email address verification by supplying the one-time code.
Let's see the above in action. If you want to learn more about sign-ups, check out our documentation on Clerk's sign-up flow.
1import { useSignUp } from "@clerk/clerk-react";23const { signUp, setSession } = useSignUp();45// Create a new sign-up with the supplied email and password.6await signUp.create({7emailAddress,8password9});1011// Prepare the verification process for the email address.12// This method will send a one-time code to the email address supplied to13// the current sign-up.14await signUp.prepareEmailAddressVerification();1516// Attempt to verify the email address by supplying the one-time code that17// was sent in the previous step.18const response = await signUp.attemptEmailAddressVerification({19code: oneTimeCode20});2122// Set the newly-created session as the active session of the Clerk object23setSession(....);
1const { client } = window.Clerk;23// Create a new sign-up with the supplied email and password.4const signUp = await client.signUp.create({5emailAddress,6password7});89// Prepare the verification process for the email address.10// This method will send a one-time code to the email address supplied to11// the current sign-up.12await signUp.prepareEmailAddressVerification();1314// Attempt to verify the email address by supplying the one-time code that15// was sent in the previous step.16const response = await signUp.attemptEmailAddressVerification({17code: oneTimeCode18});
Sign in using a custom flow
In email/password authentication, the sign-in is a process that requires users to provide their email address and their password and authenticates them by creating a new session for the user.
1import { useSignIn } from "@clerk/clerk-react";23const { signIn, setSession } = useSignIn();45// Supply the email address and the password to sign in `create`.6// If the combination is correct, the response would include the newly-created7// session.8const response = await signIn.create({9identifier: emailAddress,10password11});1213// Set the newly-created session as the active session of the Clerk object14setSession(....);
1const { client } = window.Clerk;23// Supply the email address and the password to sign-in `create`.4// If the combination is correct, the response would include the newly-created5// session.6const response = await client.signIn.create({7identifier: emailAddress,8password9});1011// Set the newly-created session as the active session of the Clerk object12window.Clerk.setSession(....);
Note that both the sign-in and the sign-up flows are extremely flexible and can cover even the most complicated authentication flows.
If you want to build custom authentication flows, you should start with Clerk's sign-in and sign-up flows, and then check out the ClerkJS or Clerk React reference docs.
While this guide describes an email/password flow, most of this is relevant to all of the authentication strategies Clerk offers. To learn about all possible setups, check out Set up your application for more information.